Create a Task
To create a new task, start Hyper Backup and click the + symbol. (The icon to the right of + lets you restore from an existing repository. And the other icon provides log information).

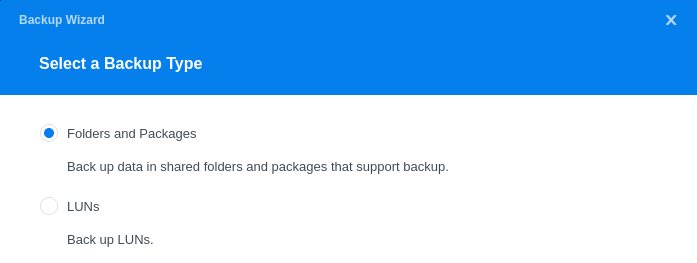
Clicking the + icon presents the following backup wizard. We’re going to backup a shared folder, so we’ll pick the first option.
.
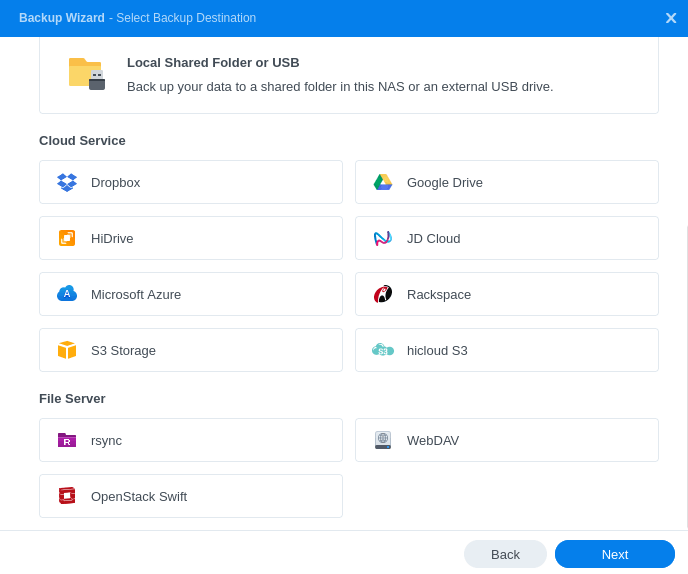
We now need to choose a Backup Destination. The destination is where we’ll be backing up our data. Hyper Backup lets users back up data to Synology’s own cloud storage, to a remote NAS device, third-party services, as well as to file servers. As you can see from the image below, there are a variety of cloud services to choose from. But we’re going to backup data to an external USB drive.
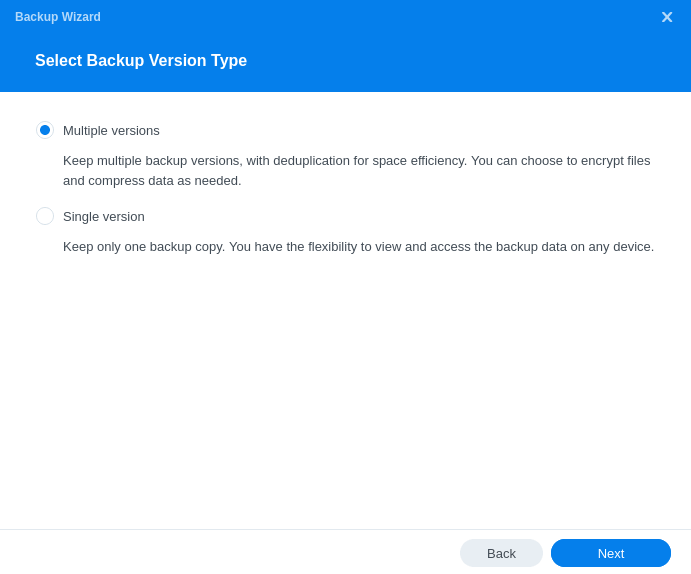
Next, we choose the backup version type. We’ll elect for multiple backup versions with deduplication. What’s deduplication? Backup deduplication minimizes storage space by detecting data repetition and storing the identical data only once.
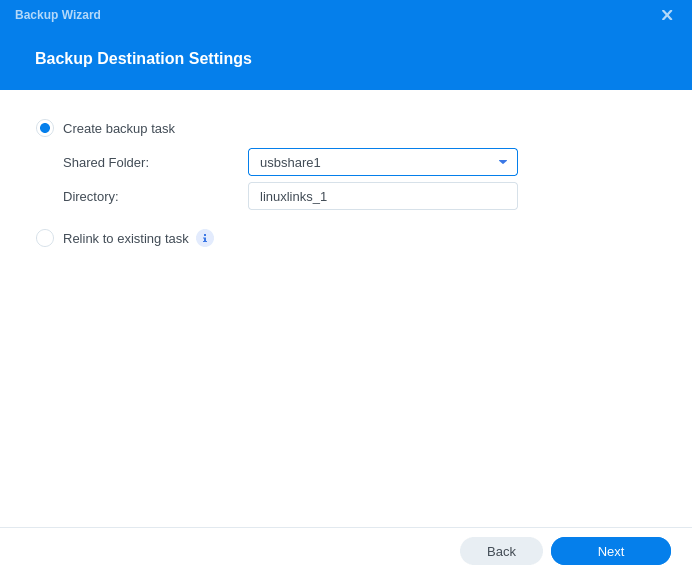
We’ll now create the backup task.
In this section, we choose what data to back up; it can be the entire NAS or specific folders. Hyper Backup offers ways to select the shared folders, folders, and files. We’re just going to choose the data that really matters on this disk; photos. In fact, this will be a second backup.
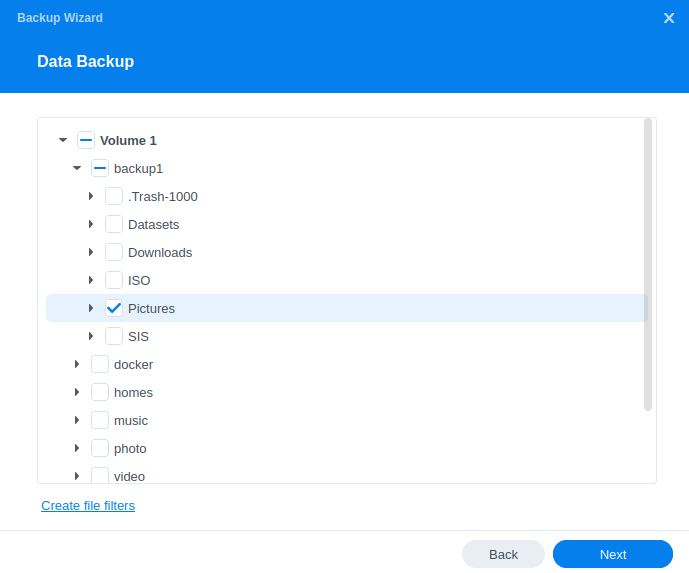
We can create file filters which lets us specify the file names or extension which we want to include or exclude, with wildcards available.
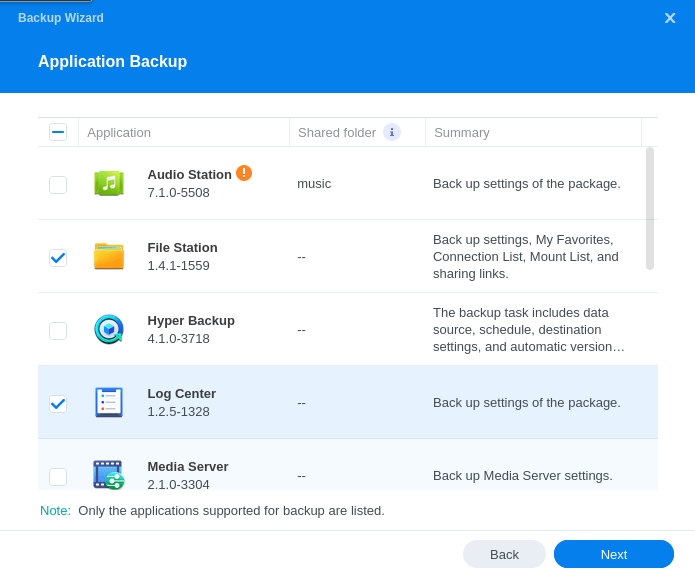
We’re next offered the option to back up the applications on the NAS. Only supported applications are listed. This functionality lets us back up the settings and configuration of the applications. I’ve selected a couple of applications.
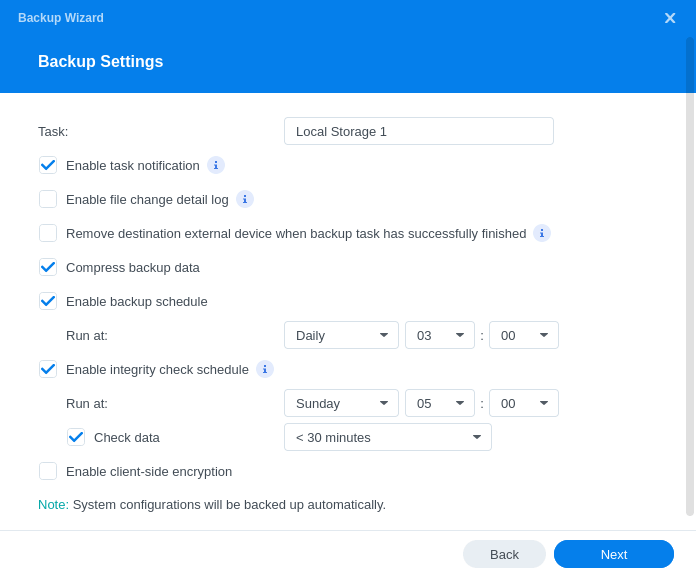
The backup wizard next offers various settings. The image below shows the default backup settings. For sensitive data, you should enable client-side encryption.
Next we choose rotation settings.
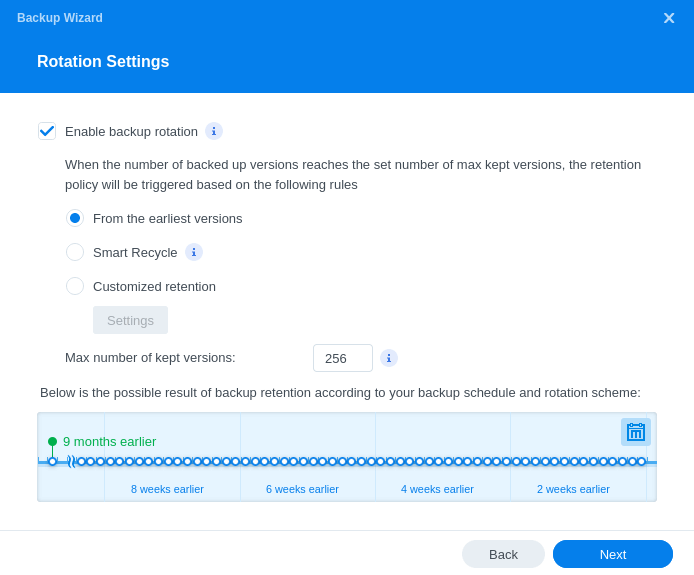
We’ve enabled backup rotation. This causes automatic deletion of our backups based on the rotation settings.
The final screen gives a summary of the backup task that’s going to be created. We’re also invited to make an immediate back up.
Next page: Page 3 – Backup Explorer and Backup Integrity
Pages in this article:
Page 1 – Introduction
Page 2 – Create a Backup Task
Page 3 – Backup Explorer and Backup Integrity
Page 4 – Restoring Data
All articles in this series:
| Synology DSM | |
|---|---|
| DSM | Review of DiskStation Manager 7.2.1 |
| Container Manager | Container Manager for Beginners |
| Hyper Backup | This is a tutorial showing you how to use Hyper Backup |
| Hyper Backup Explorer | Desktop tool for browsing, decrypting, and extracting backup data |