
Access PhotoPrism
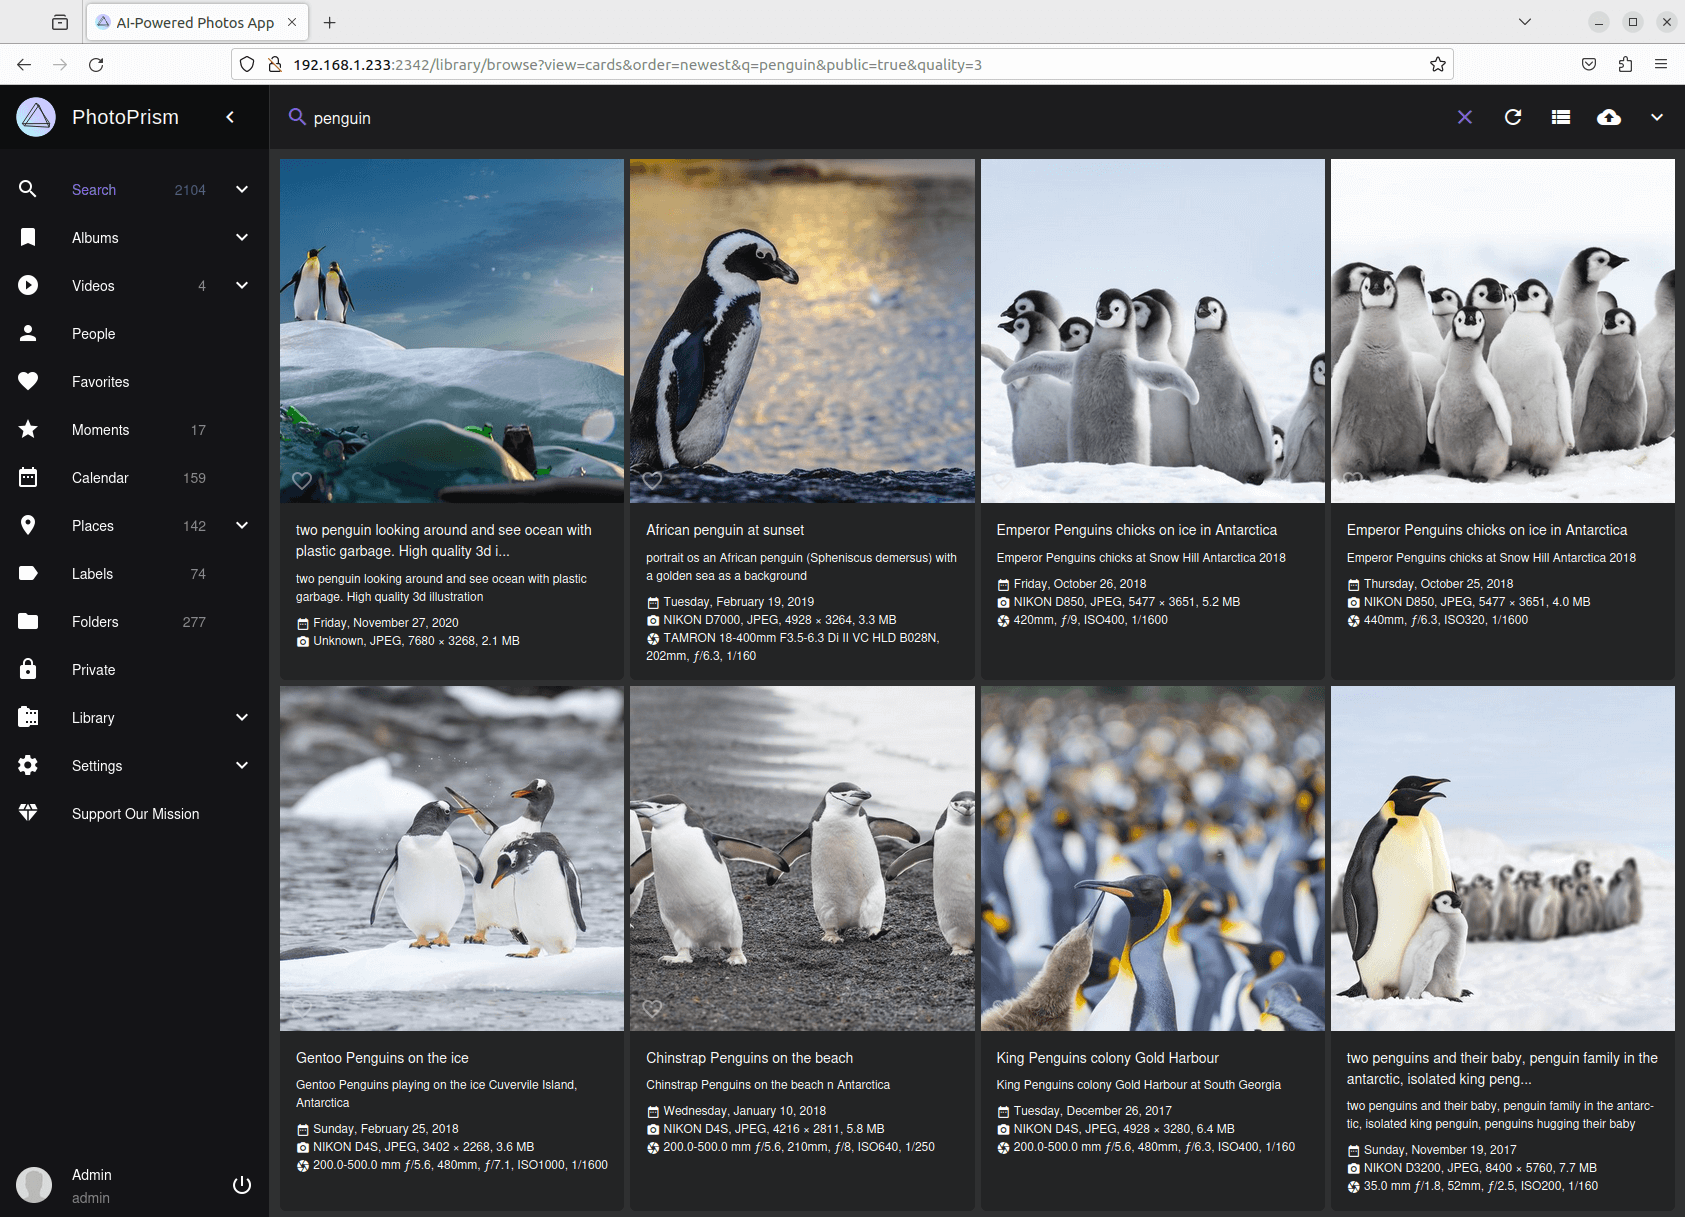
To see PhotoPrism in action, I now just need to open a web browser on my desktop machine and enter http://192.168.1.233:2342.
192.168.1.233 is the local IP address of my NAS device
2342 is the port that PhotoPrism is running on. The port can be changed in the Docker Compose config file.
This image is showing PhotoPrism running on the NAS device.
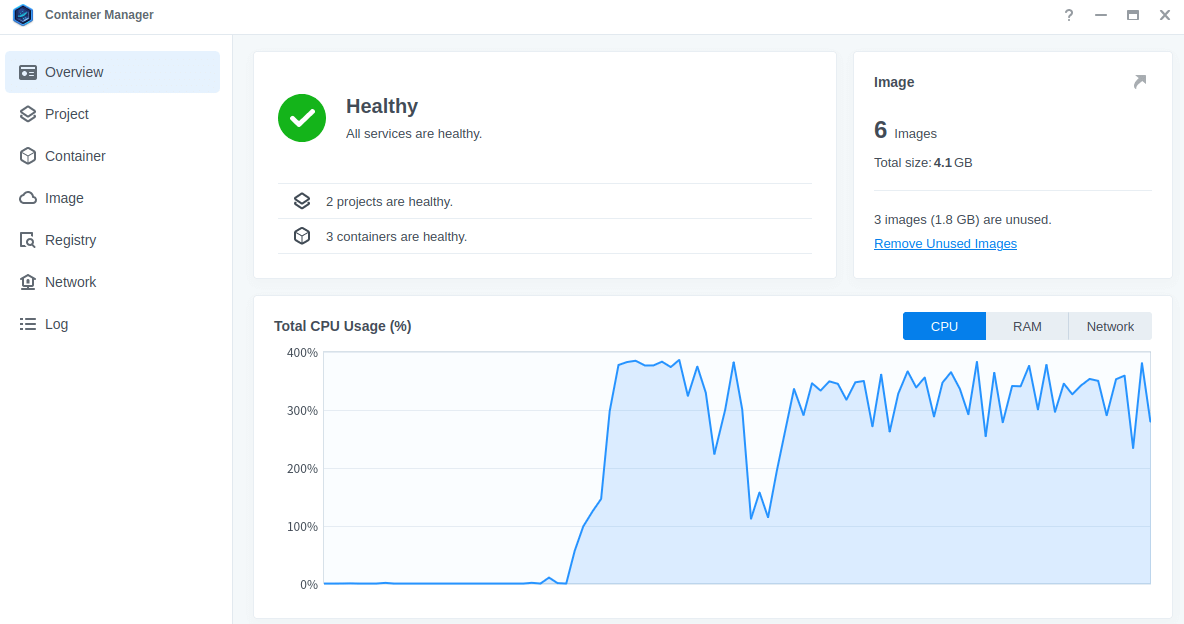
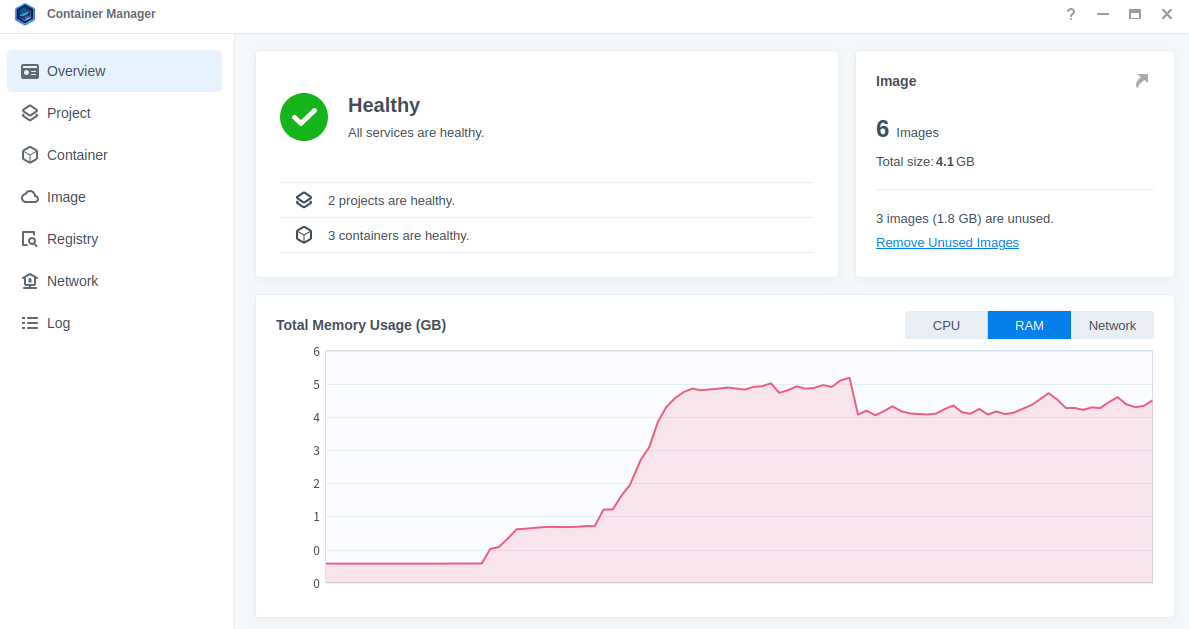
The indexing of images in PhotoPrism takes a long time especially given the NAS device I’m using has an Atom class processor. Indexing is a very CPU intensive task. The CPU and RAM images below shows the image indexing in progress. PhotoPrism needs at least 4GB of RAM to run well. Fortunately the NAS has 8GB of RAM.
Next page: Page 4 – Alternative way to set up a container
Pages in this article:
Page 1 – Install Container Manager
Page 2 – Create Project (with PhotoPrism as example)
Page 3 – Running PhotoPrism on the NAS
Page 4 – Alternative way to set up a container
All articles in this series:
| Synology DSM | |
|---|---|
| DSM | Review of DiskStation Manager 7.2.1 |
| Container Manager | Container Manager for Beginners |
| Hyper Backup | This is a tutorial showing you how to use Hyper Backup |
| Hyper Backup Explorer | Desktop tool for browsing, decrypting, and extracting backup data |
Please read our Comment Policy before commenting.
Hi Steve, I tried to install photoprism on my synology nas as you described. But my database folder is still empty and photoprism-mariadb-1 restarts with an error. What did I missed?
I suggest you contact Synology or PhotoPrism as I no longer use their NAS.
Oh, I’m having exactly the same issue, the Maria-DB keeps restarting and giving an error 🙁