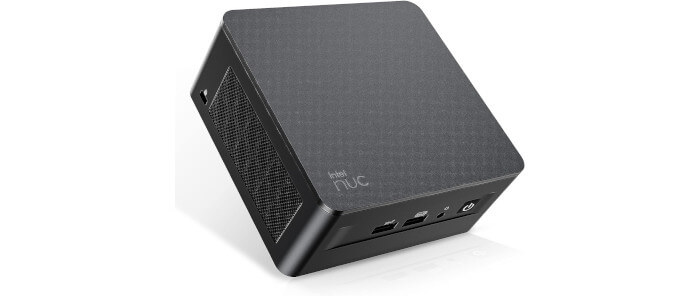
This is a multi-part blog looking at an Intel NUC 13 Pro Mini PC running Linux. In this series, we examine every aspect of this Mini PC in detail from a Linux perspective. We’ll compare the machine with modern desktop PC counterparts along the way.
This machine is from GEEKOM, a leading and respected brand and manufacturer of Mini PCs. They provide a 3 year warranty on their Mini PCs.
For this article in the series, we explore installing and configuring Manjaro on the NUC 13. Manjaro is an Arch-based Linux distribution.
Create a bootable USB key
An easy way to install Manjaro is to create a bootable USB key. Go to Manjaro’s Download page (https://manjaro.org/download/) and select X86_64, the architecture for NUC 13 (and laptops and desktops). There are three official images with different desktop environments: KDE Plasma, Xfce, and GNOME. We chose GNOME. Save the ISO to your local hard drive. It’s a 3.5GB file so it’ll take a little while to download depending on your network connection.
Write the ISO file to a USB key. You need a utility to do this. There are lots of suitable open source software available. Popular examples include Rufus (Windows only), or the cross-platform Ventoy, USBImager, or Etcher.
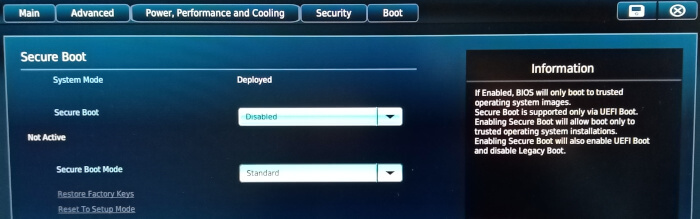
By default, the Intel NUC 13 Pro has Secure Boot enabled, a security feature designed to add a layer of protection to the pre-boot process. As Manjaro does not support Secure Boot, we need to disable it before installing Manjaro.
- Start the NUC 13 Pro and press F2 to access the BIOS;
- In the BIOS, select the Boot tab;
- Click Secure Boot link;
- Change Secure Boot from Enabled to Disabled;
- Press F10 to save the settings and exit.
Install Manjaro
Insert the USB key in any USB port and start the NUC. You will see the splash screen.
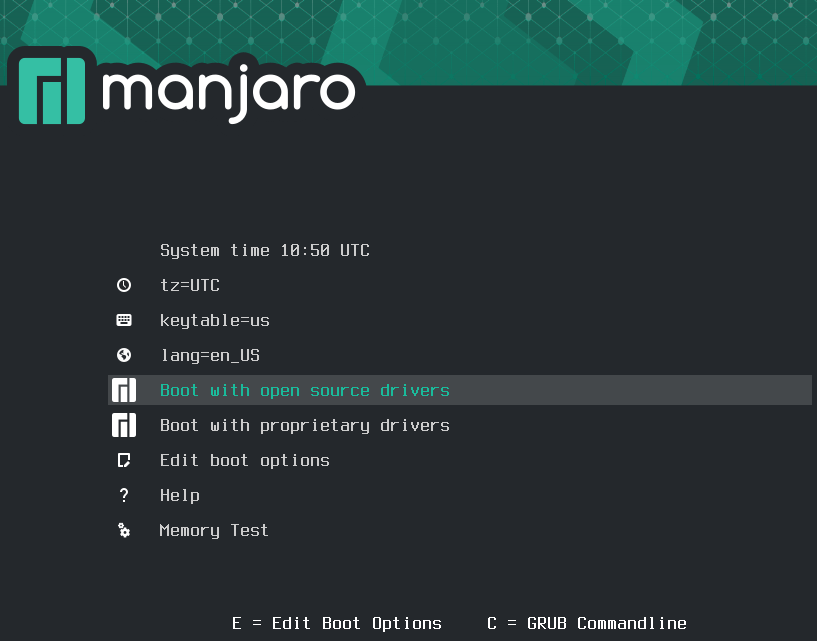
Select Boot with open source drivers. You’ll be taken to the Manjaro Linux Live environment. You can try out Manjaro with this environment, or install it to the NVMe.
A “Manjaro Hello” window will appear. Click the Launch installer button.
There are some steps to configure the installation.
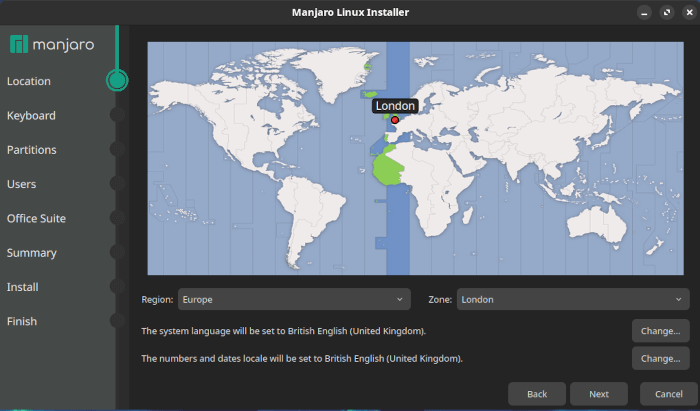
Location: Choose your location. We’re in London.
Keyboard: Here you choose the keyboard mode. The default will probably be what you need.
Partitions: You can erase the disk, dual boot, or create/resize partitions.
Users: Here you set your login name, password, and the password for the administrator account.
Office Suite: Choose from no office suite, LibreOffice, or FreeOffice. You can install an office suite after installation.
Summary: This section provides an overview of what will happen once you start the install procedure. If you’re happy, click Install.
Once everything is done, restart the system, or continue using the live environment.
Next page: Page 2 – First boot
Pages in this article:
Page 1 – Installing Manjaro
Page 2 – First boot
Page 3 – Manjaro Settings Manager
Page 4 – Install Intel iHD graphics driver
Page 5 – Other Post-Installation Steps
Page 6 – Remove branding
Complete list of articles in this series:
| Intel NUC 13 Pro Mini PC | |
|---|---|
| Part 1 | Introduction to the series with interrogation of system |
| Part 2 | Benchmarking the Mini PC |
| Part 3 | Installing Ubuntu 23.10 Desktop |
| Part 4 | Configuring Ubuntu 23.10 Desktop |
| Part 5 | Power Consumption |
| Part 6 | P-Cores and E-Cores |
| Part 7 | Gaming |
| Part 8 | Installing and Configuring Manjaro |
| Part 9 | BIOS options |
I’ve always considered Manjaro to be a somewhat mickey-mouse distro. Any distro that tells its users not to use their GUI package manager for big installs is hard to take seriously. But for beginners, I guess it’s easier than trying to fathom getting everything working in Arch.
While I understand where you’re coming from, that’s harsh criticism in my opinion. I’m a keen supporter of Manjaro. Apart from the odd hiccup with NVIDIA drivers, it’s never interfered with my workflow unlike many rolling distros.