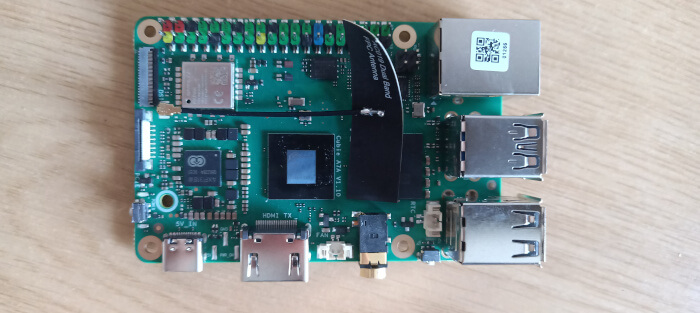
This is a new series looking at the Radxa Cubie A7A single board computer (SBC). It’s billed as an ultra-compact yet feature-rich SBC designed to deliver powerful performance in space-constrained environments.
The SBC is powered by the Allwinner A733 SoC, featuring a hybrid octa-core CPU (dual-core Arm Cortex-A76 and hexa-core Arm Cortex-A55 up to 2.0GHz), integrated 3 TOPS NPU, and Imagination BXM-4-64 MC1 GPU, providing AI and multimedia processing capabilities.
I’m evaluating the 6GB RAM model.
Getting Started
Like any SBC, you need more than just the bare board. I used a microSD card (class 10) to boot the machine. Alternatively, the computer can boot from a UFS module (or an eMMC module) which offers faster read/write speeds than a microSD card. I’m using a standard 5.1V 5A USB-C power supply, but you can also use Radxa’s own PD 30W Power Adapter.
For video output, an HDMI cable is required, and of course a monitor with an HDMI port. Throw in a USB keyboard and mouse and you’ve got what it needs. If you want wired ethernet (always recommended) you’ll also need a network cable, but the SBC has built-in WiFi.
I wrote the Radxa OS to a microSD card using balenaEtcher (but you can use similar software). Download the image (radxa-cubie-a7a_bullseye_kde_b1.output_512.img.xz) from Radxa’s website and extract the image from the compressed archive with a file manager or from the command-line. I detailed the microSD flashing process in my Radxa ROCK 4D article. As the process is identical except you need to use the image file for the A7A, I won’t reproduce the process here.
Once the image has been written to the microSD card, insert the card into the board and connect the cables up. In the image below, I’ve connected an ethernet cable, USB cable (for keyboard and mouse), HDMI cable and the USB-C power cable.
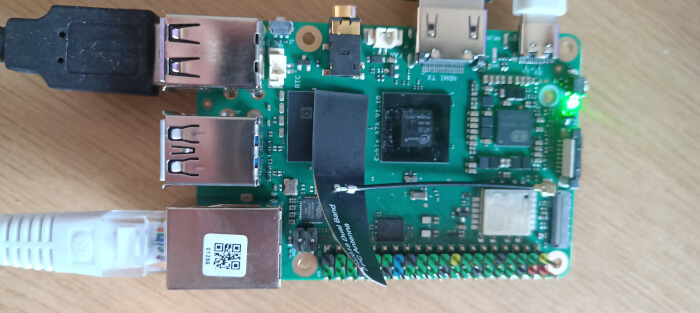
The machine has booted up when the green light is permanently on and the blue light blinks.
Pages in this article:
Page 1 – Introduction
Page 2 – Radxa OS
Page 3 – Interrogation of the system
Complete list of articles in this series:
| Radxa Cubie A7A | |
|---|---|
| Introduction | Introduction to the series and interrogation of the Cubie A7A |
| Benchmarks | Benchmarking the Cubie A7A |
| Power | I compare the Cubie A7A's power consumption to other machines |
| Radxa OS | A Debian-based Linux distribution with KDE Plasma |