
Last Updated on April 1, 2026
![]() Our Machine Learning in Linux series focuses on apps that make it easy to experiment with machine learning. All the apps covered in the series can be self-hosted.
Our Machine Learning in Linux series focuses on apps that make it easy to experiment with machine learning. All the apps covered in the series can be self-hosted.
Neural networks used for neural text to speech process large datasets to learn the optimal pathways from input to output. This is a form of machine learning since these networks use a neural vocoder to synthesize speech waveforms without user input.
Piper is billed as a fast, local neural text to speech system. It’s free and open source software written in C++ and Python. We’ll take you through the installation before evaluating the system.
Installation
The project’s GitHub details the installation process using pip.
The software featured in this series is primarily tested under Manjaro, an Arch-based distro. Unfortunately using pip on any Arch-based distro is a nightmare, as pacman should be the only system-wide package manager. Everything else must be installed in a virtual environment or a local environment. Else, you’re likely to end up with a broken system at some point.
We therefore recommend using pyenv, software which offers easy switching between multiple versions of Python.
We want Bash shell integration so we have previously added a few lines to our .bashrc configuration file.
echo 'export PYENV_ROOT="$HOME/.pyenv"' >> ~/.bashrc
echo 'command -v pyenv >/dev/null || export PATH="$PYENV_ROOT/bin:$PATH"' >> ~/.bashrc
echo 'eval "$(pyenv init -)"' >> ~/.bashrc
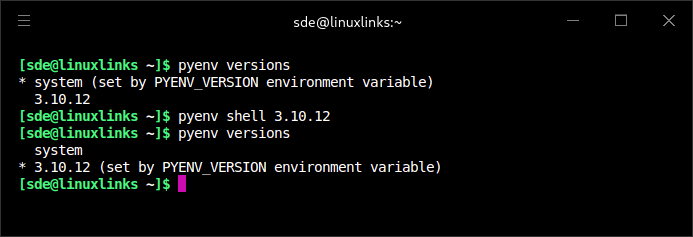
Look at the image below. The first command shows the versions of Python installed on our test system. As you can see, we have two versions installed. We don’t want to use the system version for installing software with pip, so we’ll switch to the other version with the second command. We repeat the first command which shows we’re now using a virtual environment using Python 3.10.12.
We can now proceed to install Piper with the command:
$ pip install piper-tts
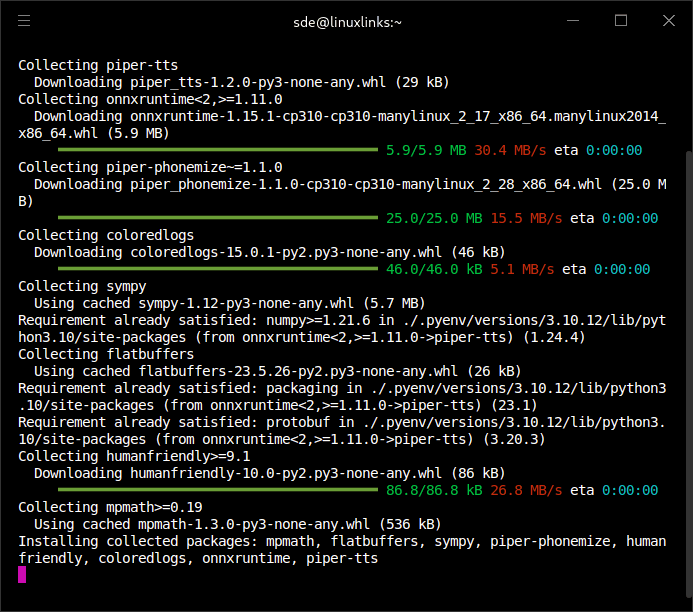
Here’s an image of the installation in progress.
We also installed the onnxruntime-gpu package so that our NVIDIA GPU is used for processing.
Next page: Page 2 – In Operation and Summary
Pages in this article:
Page 1 – Introduction and Installation
Page 2 – In Operation and Summary