
In Operation
Here’s an image of Final2X in action.

The GUI is really easy to use. We can either click or drag and drop images or folders to the interface.
Once done, click START and the image(s) will be upscaled. That’s it. Actually there’s quite a bit more to the program. The bottom of the window hosts a set of icons, the most important is the wheel icon as this lets you choose the device to run the processing on. We mostly tested the software using a dedicated graphics card.
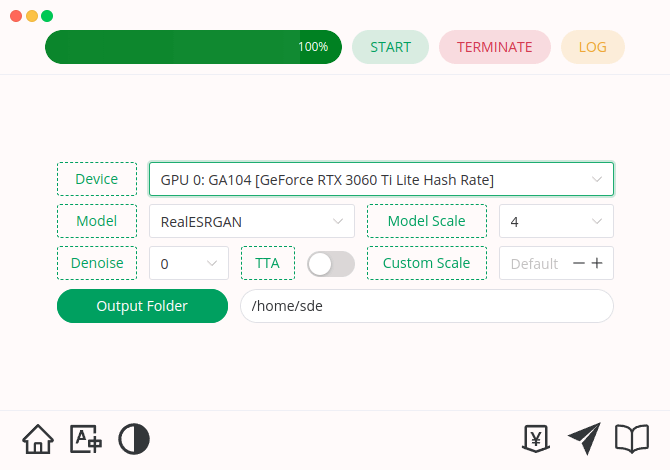
The device wheel also lets you choose between a variety of different models, the model scale, whether or not to apply denoise, and the output folder. Here are the supported models:
- RealESRGAN – a hugely popular project with over 26K GitHub stars.
- RealCUGAN-se
- RealCUGAN-pro – an AI super resolution model for anime images, trained in a million scale anime dataset, using the same architecture as Waifu2x-CUNet
- REALESRGAN-animevid
- Waifu2x-CUNet
- Waifu2x-upconv_7_ani
- Waifu2x-upconv_7_photo
There’s also a dark theme available.
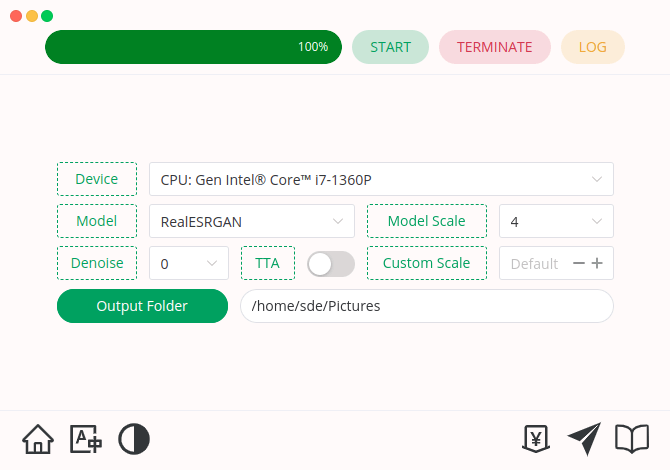
You don’t need a dedicated graphics card to use the software, as there’s CPU support too. Click the Device button lets you toggle between your CPU and any dedicated GPU.
Here’s an original image with a low resolution: 700×467 pixels.

Let’s upscale the image using the RealESRGAN model. You’ll need to click the image below to see the 4x increase in resolution.

As you’d expect processing with a CPU is much much slower than a dedicated graphics card. The image above took 91 seconds to process on the i7-1360P CPU. Contrast that with a processing time of about 1 second to upscale the same image with an NVIDIA GTX 3060 Ti dedicated graphics card. And taking it to extreme, we upscaled that generated 4x image a further 4x. With the dedicated graphics card, even that generation only took 22 seconds.
While the i7-1360P CPU has 12 cores (16 threads), processing time is vastly exacerbated because the upscaling only uses a single CPU core.
Summary
Final2x is delightfully simple to install and use. Just make sure you’ve got a dedicated graphics card if you want fast processing.
It faces stiff competition from other open source GUI frontends including Upscayler and Upscaler.
The software uses Electron. Think Electron think bloated software. And yes Final2x consumes a lot of RAM. According to ps_mem, it’s memory footprint is a whopping 3.1GB when tested processing images with the CPU (plus another 313MB for Electron).
Website: github.com/EutropicAI/Final2x
Support:
Developer: Tohrusky
License: BSD 3-Clause “New” or “Revised” License
Final2x is written in TypeScript. Learn TypeScript with our recommended free books and free tutorials.
![]() For other useful open source apps that use machine learning/deep learning, we’ve compiled this roundup.
For other useful open source apps that use machine learning/deep learning, we’ve compiled this roundup.
Pages in this article:
Page 1 – Introduction and Installation
Page 2 – In Operation and Summary
Well, I tried installing this on a fedora machine without luck. It went smoothly on a mint machine. Except, and this is why I’m writing this message, how does one actually run this program?
What did you try?