In this installment I take a look at setting up and configuring Ubuntu 25.10 on the laptop.
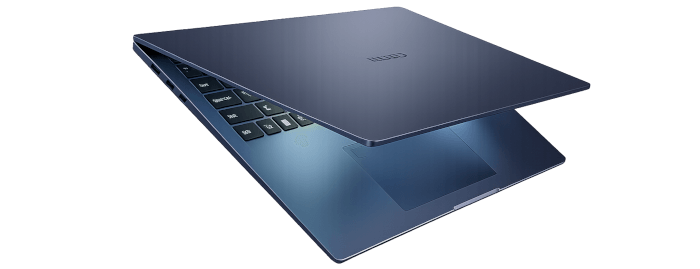
The Chuwi CoreBook Air Plus has a price of $629 (that’s not an affiliate link). There’s a $50 early bird discount available which brings the price down to $579. And Chuwi is offering LinuxLinks readers a 13% discount on the purchase price. Use the discount code LinuxAirPlus at the checkout. With both discounts applied, the price is $547.23. For UK readers, this means the laptop costs around £400. There’s also a 14-inch model available (the Chuwi Corebook Air) at a lower price.
![]() Ubuntu is a popular free and open-source Linux-based operating system that is renowned for being a user-friendly and secure alternative to operating systems like Windows or macOS. Ubuntu is available for desktops, servers, and IoT devices. A large number of Linux distributions are also based on Ubuntu which can be viewed here.
Ubuntu is a popular free and open-source Linux-based operating system that is renowned for being a user-friendly and secure alternative to operating systems like Windows or macOS. Ubuntu is available for desktops, servers, and IoT devices. A large number of Linux distributions are also based on Ubuntu which can be viewed here.
Before I can install Ubuntu on the machine I first need to disable Secure Boot in the BIOS. I won’t reproduce those steps here as they are covered in my BIOS article.
Download the Ubuntu 25.10 ISO from Ubuntu’s website. I usually install Linux distributions from a USB flash drive. Either write the ISO to a key using software such as balenaEtcher, or, as I do, use my Ventoy prepared flash drive. That way I can just copy the ISO to that drive.
I booted the Ubuntu 25.10 ISO from a USB flash drive. Booting from the USB key simply involves accessing the Chuwi’s BIOS, going to the Boot menu and making sure that the USB key is the first listed in the Boot order.
Ubuntu’s installation is very simple and consists of a few steps where I choose my:
- Language.
- Keyboard layout.
- Whether or not to connect to the internet. This has the advantage of improving installation with compatibility checks and extra software packages. I chose to connect to a Wi-Fi network.
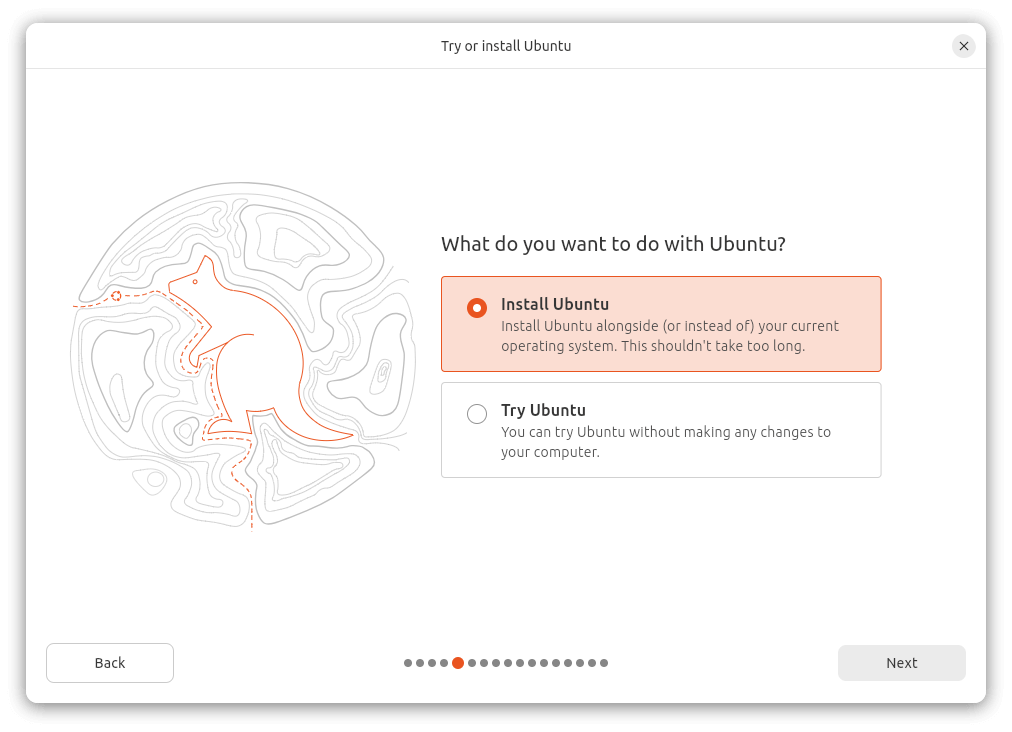
You’re next promoted if you want to install Ubuntu or just to try it without making any changes to the computer. I chose the former.
The next choice is whether or not to install recommended proprietary software. By default Ubuntu doesn’t ship with any proprietary software. I chose to install proprietary software and support for additional media formats.
There’s the option of using a standard file system without encryption, or encrypt with a passphrase. I went with the former option
Next I need to create create my account (user name, computer name, and password), select a timezone, and then review my choices.
Now the installation proceeds. Once completed, you’re prompted to remove the installation medium and press ENTER.
Update the System
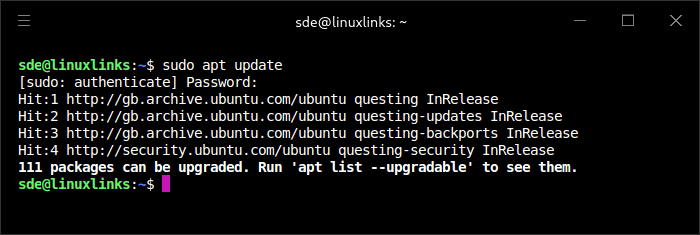
The first thing I always recommend is to update the system.
$ sudo apt update tells me there are 111 packages that can be upgraded.
To perform the upgrade, issue the command:
$ sudo apt upgrade
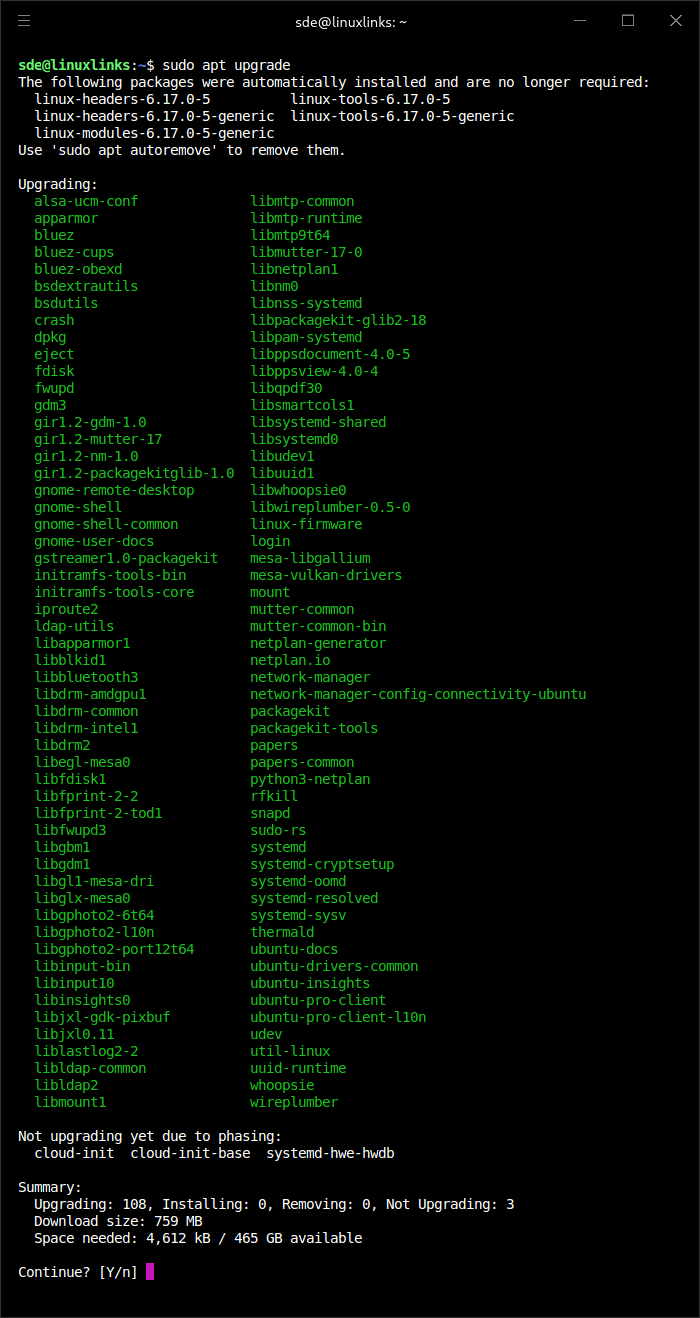
To continue, press Y and hit Return.
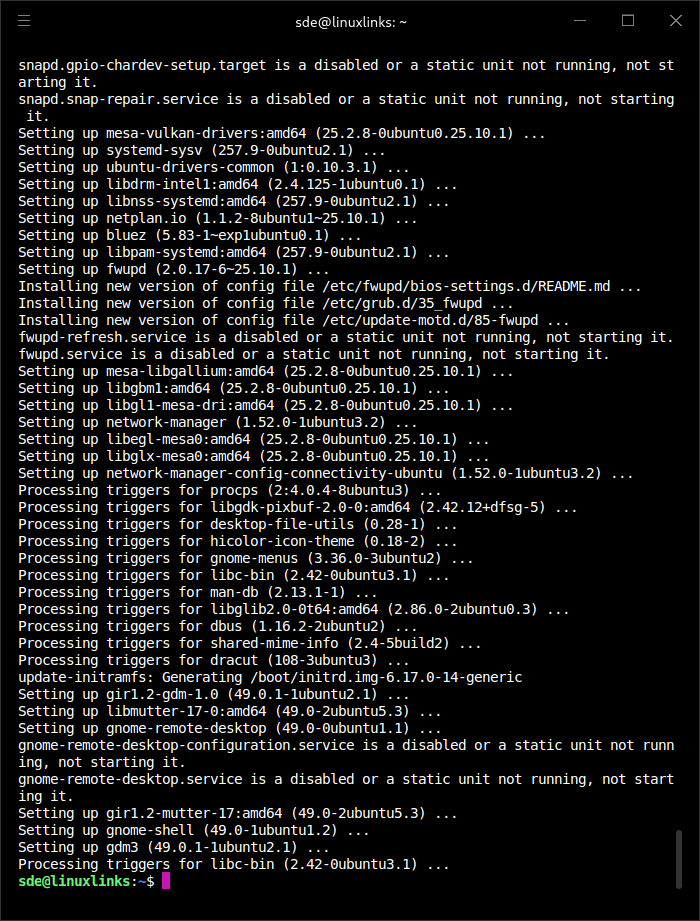
The update only takes a minute or so to complete. Contrast that with a Windows 11 update that goes on forever and often requires multiple reboots.
Let’s do a bit of housekeeping by removing packages that are no longer needed.
$ sudo apt autoremove
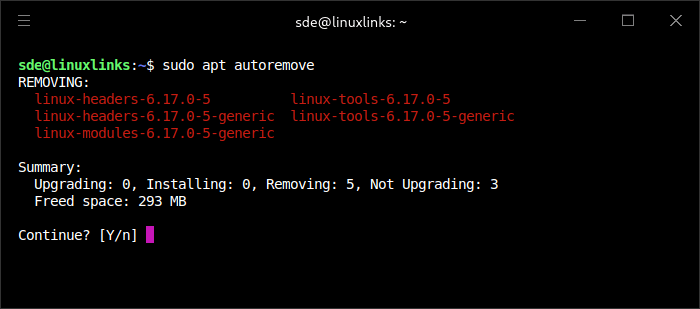
This removes the unused kernel headers, modules and tools.
RAM
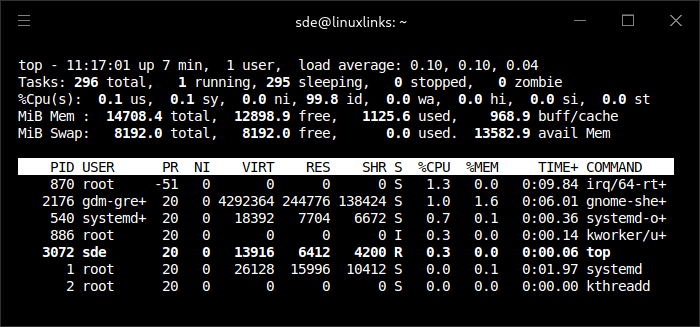
The Chuwi laptop has 16GB of RAM, but some of that RAM is allocated to the integrated GPU. Top shows the amount of memory and the size of the swap file.
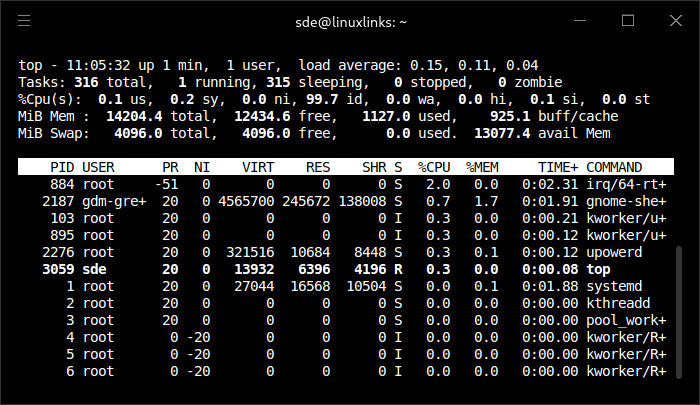
I’d prefer more system RAM allocated to the system.
I can increase the amount of system RAM available by accessing the BIOS, going to Advanced, GFX Configuration. Change the iGPU Configuration from Auto to UMA_SPECIFIED. I can then change the UMA Frame buffer size from Auto to one of 512M, 1G, 2G, 3G, 4G, 6G, or 8G. Let’s go with the lowest 512M. After saving and rebooting, top now shows system RAM has increased from 14204.4 MiB to 14708.4 MiB.
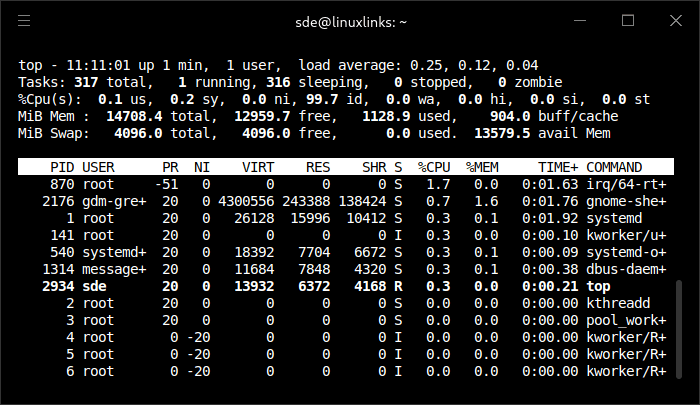
Swap
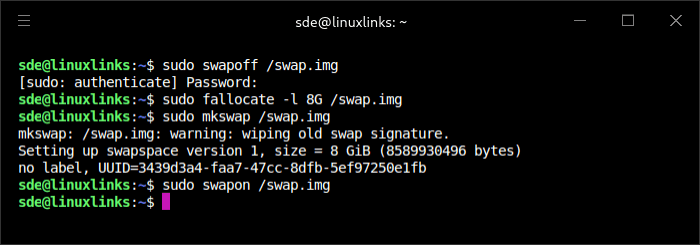
As top shows above, Ubuntu has created a 4GB swap file. My workflow is mostly geared around 32GB+ RAM machines, so the setup feels a bit tight for me.
Having a larger swap file consumes more of the NVMe disk which is not that large (it’s 512GB), but on balance, I’ll increase the swap file from 4GB to 8GB.
First, turn off the existing 4GB swap file.
$ sudo swapoff /swap.img
Now I’ll create a 8GB file.
$ sudo fallocate -l 8G /swap.img
Make that file a swap file
$ sudo mkswap /swap.img
Turn on the swap file:
$ sudo swapon /swap.img
Here’s top output showing the larger swap.
Flatpak
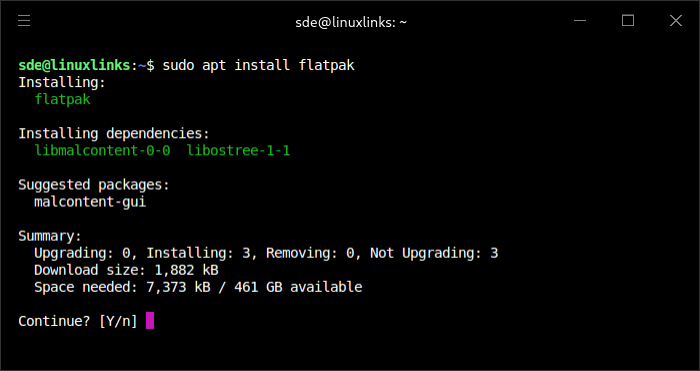
I like experimenting with software. The Ubuntu repositories lack lots of interesting open source software (or where they do, its often not the latest version). So let’s setup Flatpak.
To enable Flatpak support in Ubuntu issue the following commands in a terminal:
$ sudo apt install flatpak
Flathub is the standard place to get Flatpak apps. To enable it, run:
$ flatpak remote-add --if-not-exists flathub https://dl.flathub.org/repo/flathub.flatpakrepo
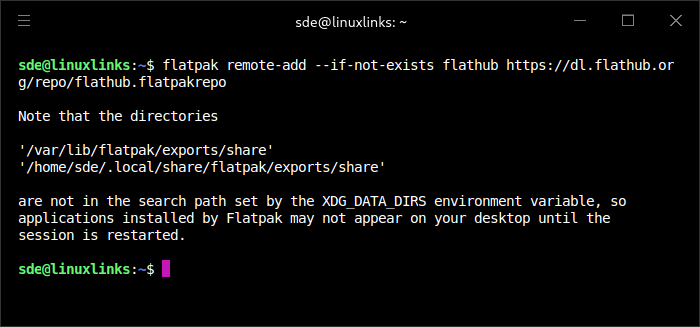
A reboot is then needed
Install Software
This is where you’ll need to decide what software you want to use. Things I recommend installing first:
Webcam software
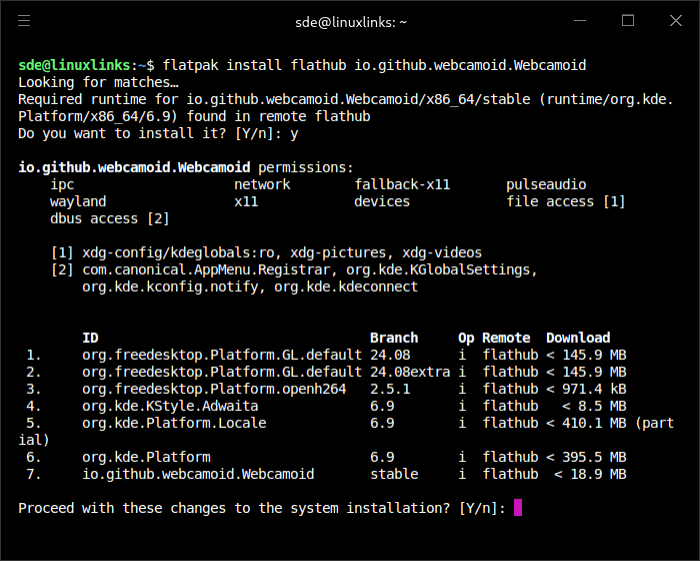
The Air Plus has a 2MP webcam. I recommend install Webcamoid. Use flatpak as you get the latest version (which isn’t the case with the Ubuntu repositories).
Conserve battery
TLP is a feature-rich utility for Linux, saving laptop battery power without the need to delve deeper into technical details.
First install TLP with $ sudo apt install tlp
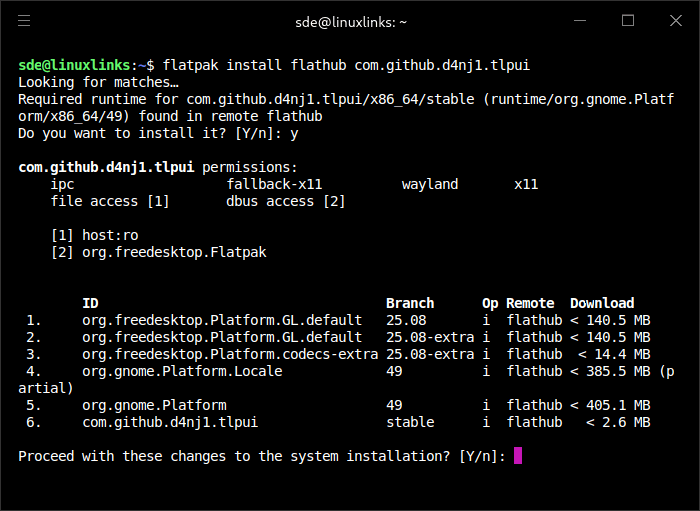
If you like using GUI tools, you may like TLP-UI, a handy TLP configuration utility.
TLP-UI can be installed from Flathub.
$ flatpak install flathub com.github.d4nj1.tlpui
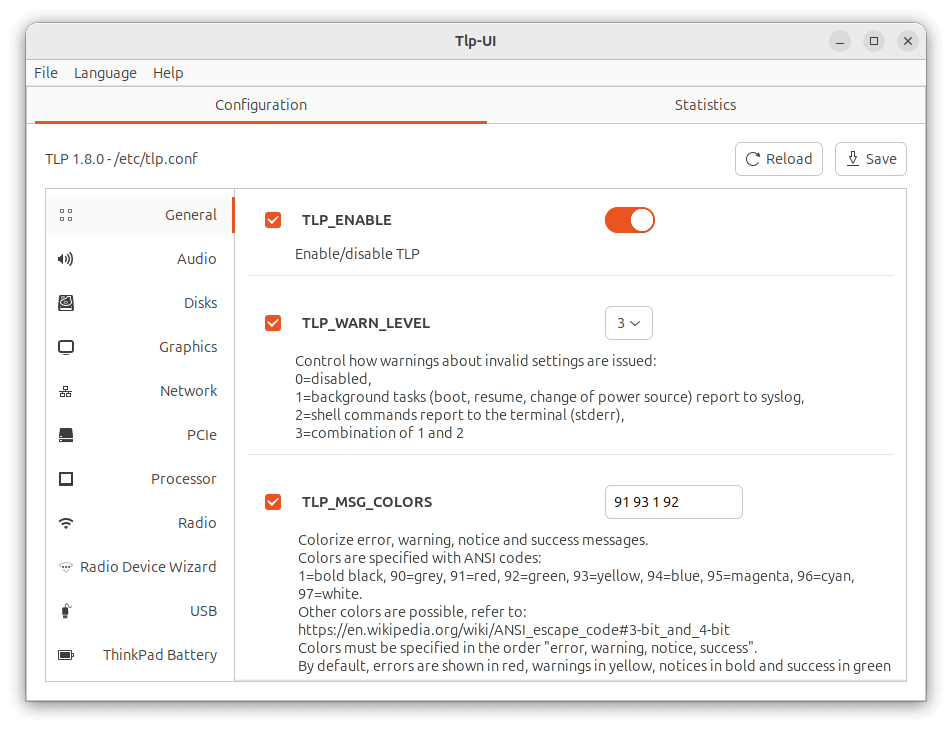
Here’s TLP-UI in action.
Other software to install will be dictated by your own preferences and requirements. But don’t forget our curated open source software collection as there’s bound to be software that’ll interest you there.
Complete list of articles in this series:
| Chuwi CoreBook Air Plus | |
|---|---|
| Hardware Review | A concise look at the hardware |
| Specifications | Using the inxi tool to delve into the laptop's specifications |
| Benchmarks | I put the laptop through a series of benchmarks |
| BIOS | Basic Input/Output System |
| Power Consumption | Testing the laptop's power consumption |
| Battery | Battery life while updating the LinuxLinks website |
| Ubuntu | Configuring Ubuntu 25.10 |