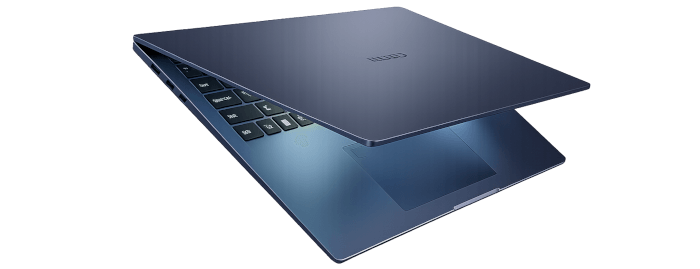
This is a new series looking at the Chuwi CoreBook Air Plus running Linux. In this series I’ll examine every aspect of this laptop from a Linux perspective.
The Chuwi CoreBook Air Plus has a price of $629 (that’s not an affiliate link). There’s a $50 early bird discount available which brings the price down to $579. And Chuwi is offering LinuxLinks readers a 13% discount on the purchase price. Use the discount code LinuxAirPlus at the checkout. With both discounts applied, the price is $547.23. For UK readers, this means the laptop costs around £400. There’s also a 14-inch model available (the Chuwi Corebook Air) at a lower price.
In the world of computing, BIOS, which stands for Basic Input/Output System, plays a crucial role. It’s a type of firmware that kicks in to provide essential runtime services for operating systems and programs, while also handling the hardware initialization needed during the boot-up process. When you power on your computer, the BIOS firmware, typically pre-installed on the motherboard, ensures everything starts up smoothly.
To access the Chuwi’s BIOS, power on or restart the laptop. Then press the Esc key repeatedly (about once every second) as soon as the laptop starts up. This opens the Aptio Setup Menu.
I normally capture BIOS screens using a USB capture card. But sometimes that’s not possible with a laptop. In this instance the Chuwi’s BIOS only outputs to the laptop’s built-in display. Try as I might I couldn’t coax HDMI output direct from the BIOS despite many attempts. So I’ve resorted to camera pictures. I’ll keep the images to a minimum and instead describe the functionality in written form.
The Air Plus has a traditional BIOS main page, no snazzy splash screen that’s often provided. No loss really.
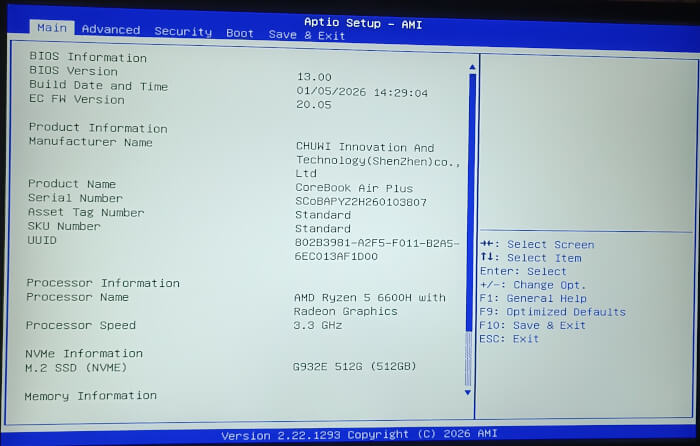
Not shown in the image is the memory information, system date and time. More interesting is the Advanced menu.
Advanced
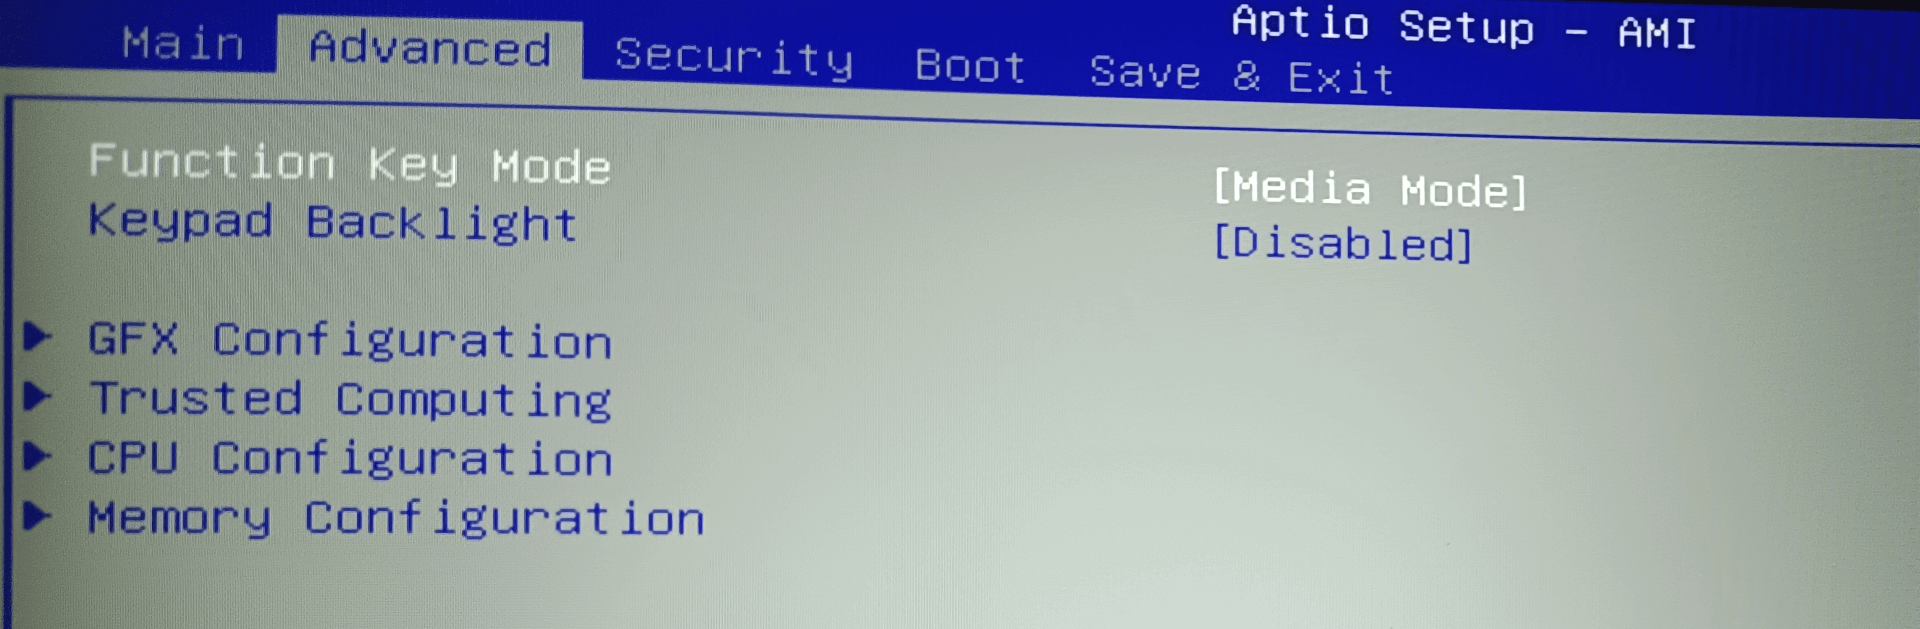
Function Key Mode – set to media mode by default,but it can be changed to function mode.
Keyboard Backlight – this sets the keyboard backlight lamp constant-on light switch. By default the backlight is disabled in the BIOS, but you can either enable it here, or enable it on demand in Linux.
GFX Configuration – this gives you the option to change the amount of system RAM allocated to the iGPU.
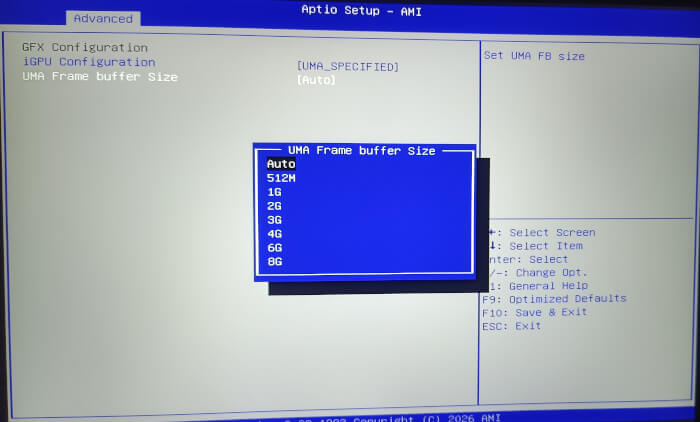
Given my laptop has 16GB of RAM, I won’t be allocating too much to the iGPU.
Trusted Computing – this lets you enable or disable support for security device. If disabled, the TCG EFI protocol and INT1A interface are not available.
CPU Configuration

This section lets you enable/disable no-execute page protection, enable/disable CPU virtualization, enable/disable hyper threading technology, and enable/disable core performance boost. I won’t need to ever change any of these settings.
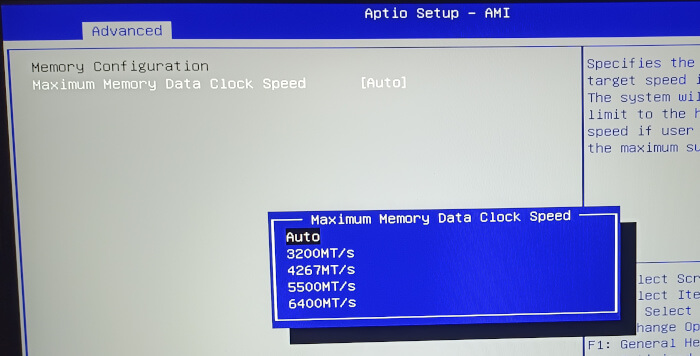
Memory Configuration
The final option in the Advanced setting lets you change the maximum memory target speed. The laptop has 16GB of DDR RAM running at 6400MT/s. No need to change this setting.
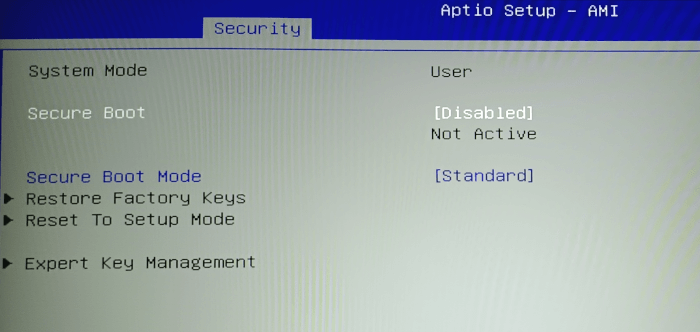
Security

The Secure Boot is one setting that I have to change so that I can boot Linux distributions. Change it from Enabled to Disabled.
Boot
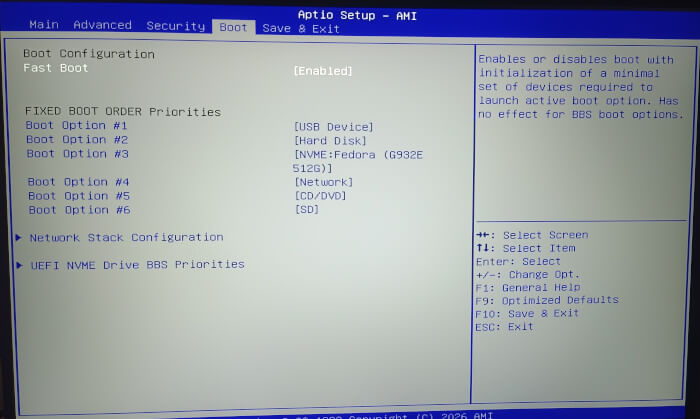
Here we can set the boot order. This is useful for booting from external devices.
Complete list of articles in this series:
| Chuwi CoreBook Air Plus | |
|---|---|
| Hardware Review | A concise look at the hardware |
| Specifications | Using the inxi tool to delve into the laptop's specifications |
| Benchmarks | I put the laptop through a series of benchmarks |
| BIOS | Basic Input/Output System |