
In Operation
User interface and ease of use
Backup software should be easy to use. A clear and intuitive user interface will particularly be useful for non-technical users.
The software provides an attractive Qt-based frontend, but there’s also a command line tool (backintime), so we have the best of both worlds.
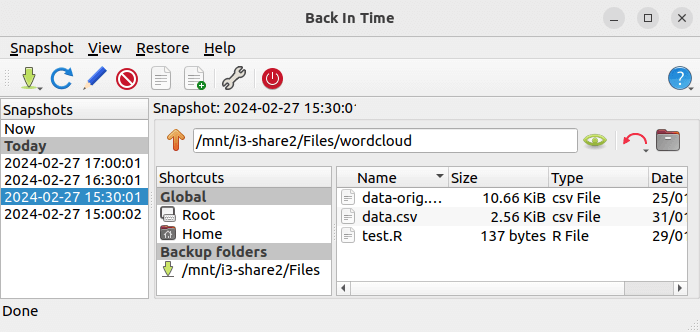
Back In Time is very simple to use. You just need to select which folders to backup, where to save the snapshots and set the backup frequency. The interface is nicely organised. You set the location of the snapshots in the General tab, and the define the files and folders to backup in the Include tab.
Automation and Scheduling
 Performing backups manually is prone to mistakes, omissions, and delays. Good backup software should automate the backup process. Scheduling backups offers a level of consistency that helps keep the backup process reliable.
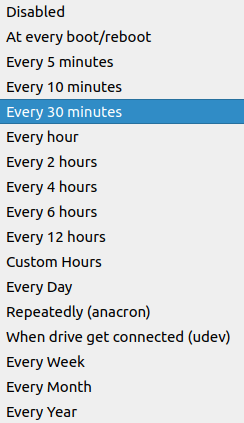
By default, scheduling is disabled in the GUI.
But it’s easy to enable backups to run on a regular basis. Go to Settings. In the General tab there’s the option to choose the frequency of backups.
In the image below, we’ve chosen a backup every 30 minutes. If there aren’t any changes from the last backup, no backup is made.
The custom hours option is useful. Enter a string such as 8, 12, 18, 23 and backups will be made at these hours only.
There are other options available which makes for very flexible scheduling options.
Storing backups
Efficiency comes from avoiding duplication of file storage. File compression is also an important factor. Encryption ensures security of your files to protect from unauthorized access. Even if backup files are stolen, the actual data cannot be deciphered without a decryption key.
Back In Time uses rsync with --hard-links. While each snapshot appears to contain every file, only changed files are copies with unchanged files use a hard-link. This avoids duplication of file storage.
For encryption, you need to store your backups on a LUKS-encrypted volume. We can store encrypted snapshots on remote hosts using ssh.
Note, Back In Time also does not support compression of backups, as it would need a fundamental change to how backups are performed with rsync. If you need compression and integrity-checking, you’ll need to use a filesystem which supports compression such as btrfs, ZFS, or use a daemon to transparently compress filesystems.
Reporting and Testing
Regularly testing your data backup strategy is essential for ensuring that backups are functioning as expected and that any configuration changes don’t cause any unexpected errors. It also allows you to identify and address any backup issues.
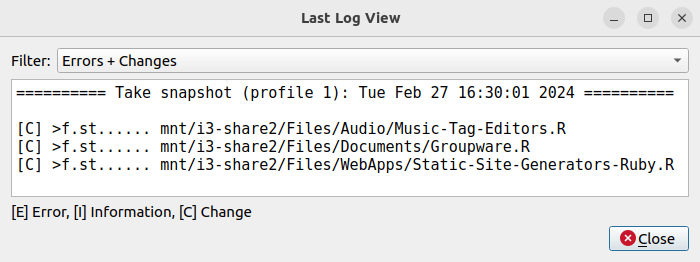
The GUI shows any errors in a particular snapshot.
We can also view each individual snapshot log which shows, in detail, which files were changed, and any errors. There are sensible filtering options for the logs which let you see all entries, errors & changes, only errors, only changes, and information.
Customization
Backup software should allow you to customize your backups based on your requirements.
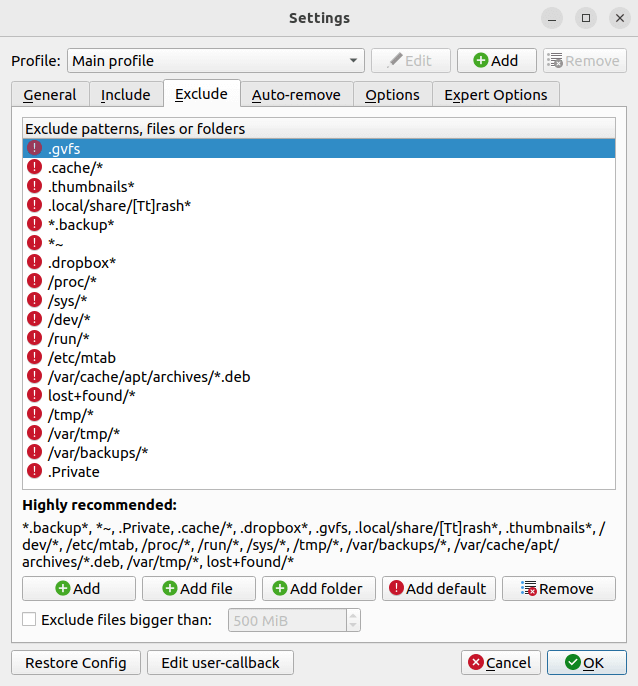
The software offers good customization options. By default, the software excludes certain patterns, files, or folders, and recommends additional entries to be excluded from backups.
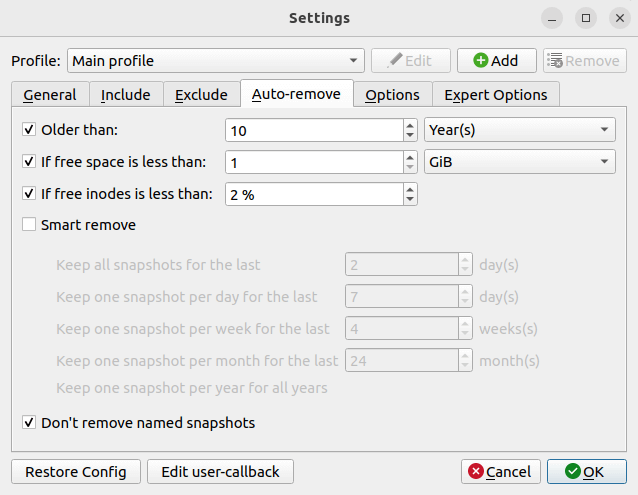
Here are the default auto-remove options.
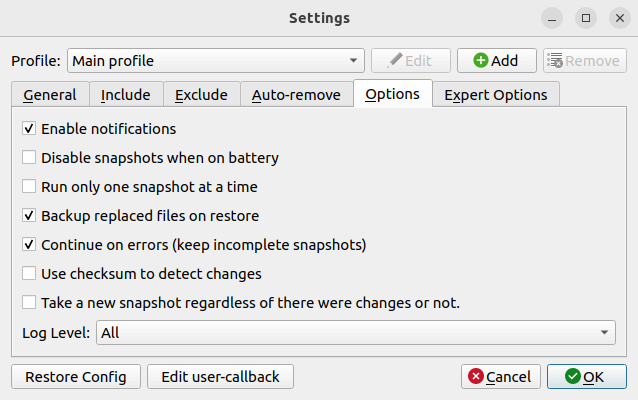
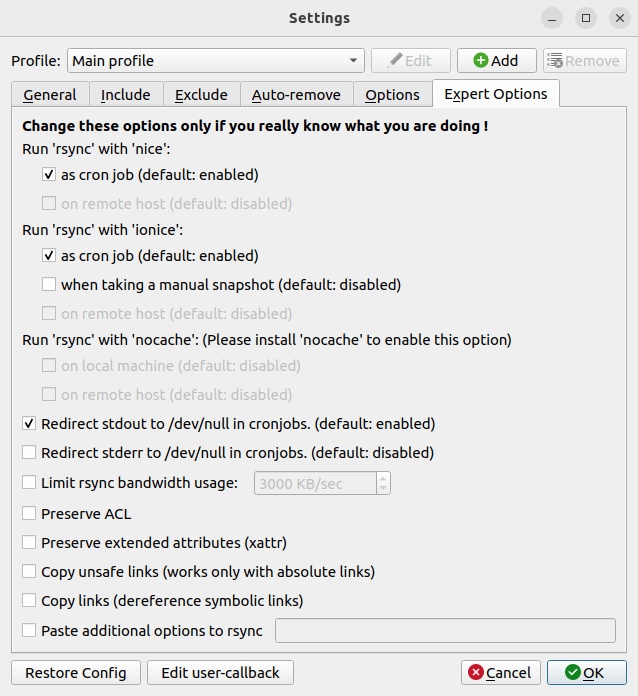
Other options that are available.
Cloud support
Local backups won’t protect you from burglary or natural disasters.
Unfortunately, Back In Time doesn’t support cloud storage as either a backup source or a target. This is because it uses rsync as backend for file transfer which needs a locally mounted file system or an ssh connection.
Documentation
Good backup software will provide clear documentation that explains how to use the software.
The Help entries in the GUI shows the manual page for the command line tool and backintime-config. They are well written. There’s also a man page for the Qt frontend, and the project provides a detailed FAQ which covers most bases.
Pages in this article:
Page 1 – Introduction and Installation
Page 2 – In Operation
Page 3 – Summary
Please read our Comment Policy before commenting.